Tuesday, August 27, 2013

Cheeky Monkey Nails!


After buying two new Catrice Cosmetics Ultimate Nail Lacquers I decided to do a manicure with my new purchases! I actually really recommend Catrice nail polishes to anybody. They are €2.45 each in Penneys stores across the country. Catrice polishes are the best for those of us that want all the colours just because, who knows, you may one day need them! I personally love Catrice polishes because they are cheap, come in a huge variety of colours, paint on thick and pigmented while lasting a good week on my nails sans chips!

I bought two colours on my last trip into Penneys, 700 Birdy Reloaded! (a bright yellow colour with a slight shimmer to it) and 720 Bruno Brownani (a deep, dark brown colour). Both of these colours go on smooth and a little thick. The yellow bottle suggests using two coats for best coverage but I honestly find that with these colours, more often than not one coat does a perfect job!


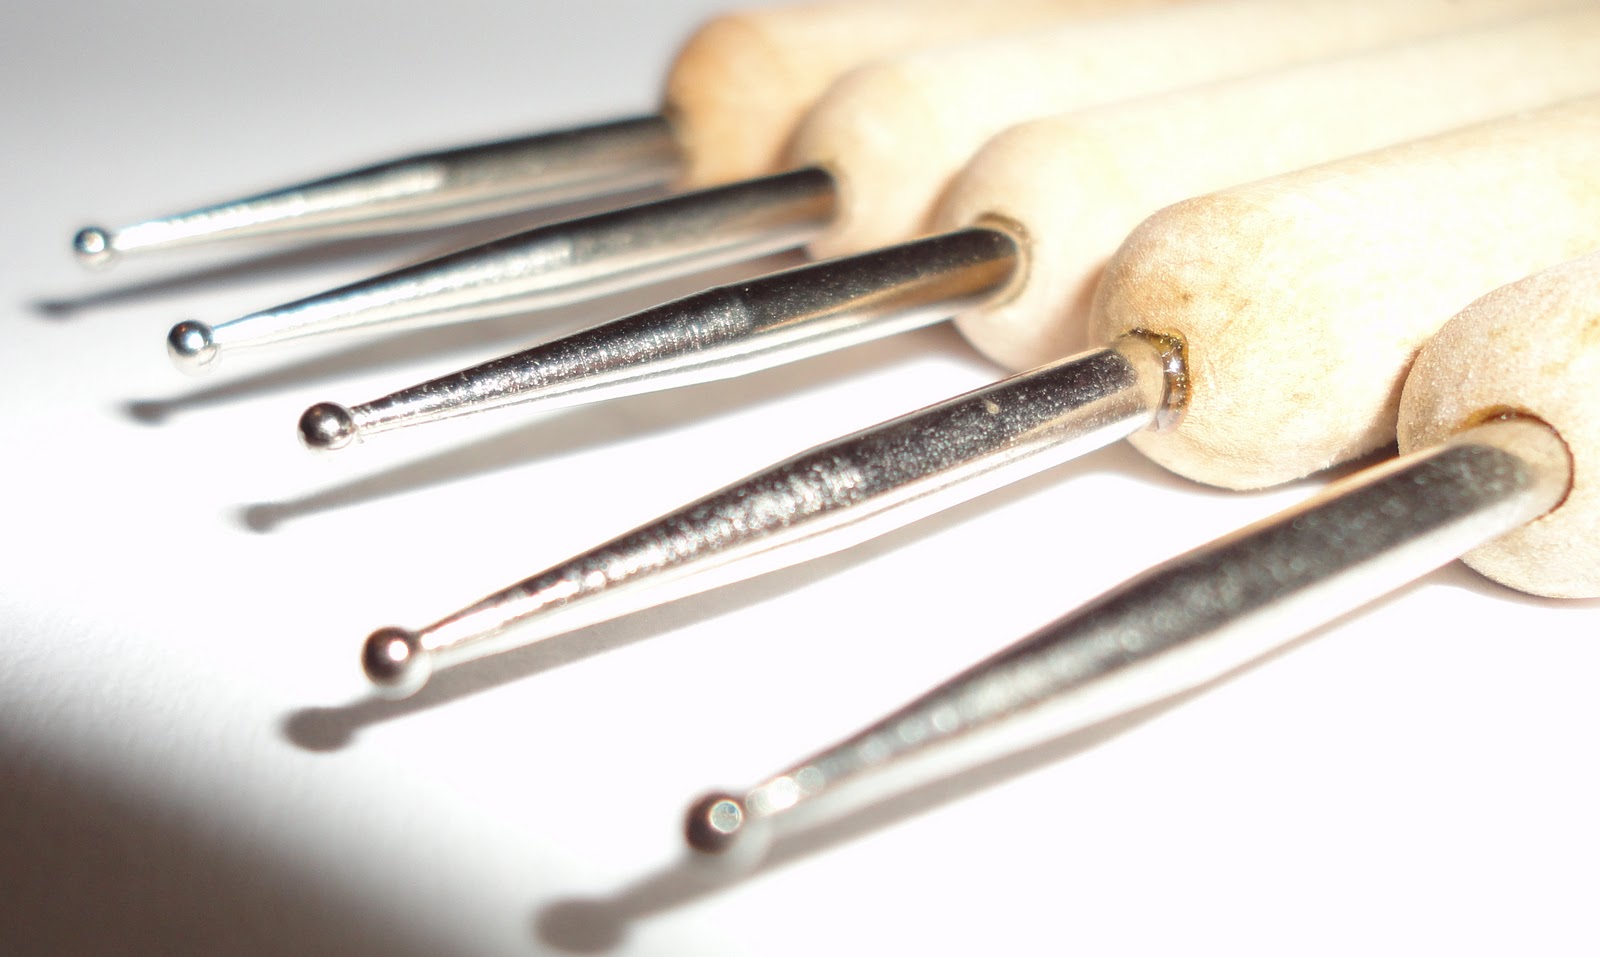
For this manicure you'll also need a dotting tool and a striper brush which I talked about in this blog post. On top of those you'll also need nail polish colours in a lighter brown (I used Gosh 596 Miss Mole), white and black.

First we'll look at the banana nails:
Paint your index, middle and pinky fingers with your yellow nail polish
Once the yellow has dried take a striper brush and dip it in back paint. Here we are going to paint small black outlines of bananas starting from the nail bed and reaching out to the tips of your nails.
As you can see here, I am not that great at drawing bananas, but it's okay it's supposed to look a little more abstract than your average banana as it's just black outlines on a yellow base. Paint as many or as few as you want, I liked to paint some bananas curving in the opposite direction to the others but again, it's up to you how you want them to look.

Next up are your monkey nails! These are surprisingly easy to do and look really cute, plus they only take five minutes from start to finish. Firstly you need to take your dark brown and paint almost all of your thumb and ring fingernails with it, leave an arc of your natural nail unpainted at your nail bed, as you can see below. Then I want you to paint your lighter brown in an arc again from about half way down your nail like so.
Next we'll create the monkeys ears. Take your dotting tool and dip it in dark brown paint, dot it on either side of the dark brown arc. Then pick a smaller sized dotting tool and dip it in your lighter brown. Dot this light brown circle within the two small dark brown circles and voilĂ  you have cute monkey ears!
Now for the finishing touches that are going to take this oddly shaped brown blob and turn it into your cute monkey design! The eyes are simple, take your largest dotting tool and dip it in white nail polish. Dot the white in two circles, close to each other at the centre of the light brown arc. Take a smaller dotting tool and dip it in black. Once the white has dried dot a small black pupil inside each eye. The nostrils are just a little below the eyes. You take your smallest dotting tool and dip it into your black once more. Then you just place two small dots beneath the eyes and you have painted your little monkey.
Simple, right? Obviously you can use different colours, go crazy! Have purple and blue monkeys on your nails, they are your nails after all! Once you've done the above steps just make sure to use a good top coat to keep your nail design protected.


Here is a photo of how this design turned out on me. I really enjoyed doing this manicure as it's super easy and not at all time consuming. The best part of all was that I didn't need to spend a fortune on lots of different expensive nail polishes!

Monday, August 26, 2013

Nail Art Tools!

A few people have asked me lately how I do my nail art designs so I've decided to tell you all exactly what I use so you can try them out yourselves!


  1. Dotting Tools

Dotting tools are easily found pretty much anywhere on the internet. You can pick up a nice varied set of them for as little as €1.15 on ebay like these. However, if you for some reason don't like using your credit card online like me then you can pick up the above set in the Art & Hobby shop in Stephen's Green shopping centre in Dublin for about €3, I'd imagine you should be able to purchase them in any craft shop for a reasonable price.

Dotting tools are just double ended sticks that have metal pins poking from either end. These pins have various sized spheres at the end of them. These spheres are then dipped into your nail polish and dotted on your nail. This leaves a perfect circular dot on the nails surface.

Alternatively if you decide you don't want to commit to spending your precious euros on an artistic whim, here's a few examples of handy household items that you can use instead of a dotting tool:
  •  cocktail sticks (for smaller dots)


  • Bend a bobby pin out (you can use either end to dot with)

  • Stick a pin into the eraser of a pencil (you can use the end of the pin to dot away)

2.  Striper Brushes


Striper brushes are again, easily found on the internet. If you want a large varied set that have brushes for different textures and techniques look here. They're for as little as €1.15 on ebay again. However, if you've searched high and low for a shop that sold them in Ireland search no more! Hairspray down Henry Street in Dublin has a wide variety of good quality striper brushes for about €5 each.


Striper brushes are paint brushes with thin heads that create perfectly smooth lines and stripes on your nails surface. I personally prefer a thin short brush head as it gives me more control when painting designs but it's really up to you what brushes you decide to invest in. Bigger brush heads like the fan brush above create different textured surfaces which leads to some creative nail art designs.


There are, as always, easy to find household items that double for striper brushes too. Although, I must admit even having just one proper striper brush in your collection is a great asset as it is handy when you want to do fine lines. However here are a list of alternative tools you could use instead of a striper brush:
  • cocktail sticks (dip in paint and draw along in the desired line, however cocktail sticks don't make the neatest lines because they have one wooden tip as opposed to smooth bristles)
  • thin paint brushes (i find that the bristles don't work as well with nail polish/remover in these)

  • nail polishes with striper brush heads built in, instead of the usual flat ones

3.  Masking Tape


This is an easy tool to find at home and is a great thing to have when you want to create a geometric design on your nails. You cut the tape into strips at the desired width and length for your design. After your base coat has dried fully you just place the tape where you want to and paint over it. Before this new coat has dried you remove the tape and see your new clean cut, geometric design.


4.  Cotton Ear Buds


We all have them in the dark recesses of some bathroom cabinet but have you ever thought to use them for cleaning off those messy outside the line bits of nail polish around your finger nails after you've painted them? Well now you know that when painting your nails cotton ear buds are definitely a must. However you could use a cheap make up brush dipped in nail polish remover and sweep it around your nail bed to remove that mess and clean up your manicure!


5.  Sponges

Sponges are great for creating soft textures on your nails and cute designs, for examples check out my tutorial that uses a sponge here. You can see there that I used a sponge for a quick and easy nail art look, which is what makes having a sponge with you when doing nail art a great idea. Your sponge needn't be pricey, I bought this set in Penneys that came with three nice sized sponges for €4 but you can literally use any sponge at all, sure chop off the corner of the sponge in the kitchen sink!
I hope this helped all you fellow nail art lovers in your quest to have the craziest nails.


Monday, August 19, 2013

Lush Lip Scrub Review

At the freezing start of this year, when waiting for the bus could result in the loss of toes to frost bite, I found my lips started to get very dry and flaky. As someone who uses a moisturising lip balm regularly I was surprised as I normally had soft, crack free lips. Seeing as the colder months are my favourite time to wear deep, dark lip colours I wanted a quick solution to my lip dilemma. The obvious remedy for dry flaky skin is exfoliation. I am a huge believer in exfoliating your skin regularly (not just your lips, I'm talking head to toe dead skin cell removing, body firming exfoliation) however before last winter I'd never really felt like my lips of all places needed to be exfoliated. Oh how wrong I was!


I must admit, I am a sucker for popping into Lush at the top of Henry Street in Dublin whenever I'm shopping just to smell their products. This store smells divine. The bath products all smell out of this world and because of this I'd never really looked at anything else in the store bar the fizzy bath bombs and luxurious creams. However, after researching lip exfoliators online I had noticed that Lush actually had a range of deliciously flavoured lip scrubs. Intrigued, I popped into the Lush store on my way home that Friday and had a gander at them.

The lip scrubs are usually situated around the cash registers at the top of the store. They come in three sumptuous flavours: Bubblegum, Popcorn and Mint Julips.


Lush claims to focus less on fancy packaging and more on the quality of the ingredients in their products. All these lip scrubs are vegan friendly and are preservative free. The two main ingredients in these are castor sugar (to gently remove the dead skin) and organic jojoba oil (to soothe and moisturise). After these main ingredients there are other natural ingredients added to create the flavouring for each scrub.

I chose 'My Boy Lollipop' a cheerful pink coloured, bubblegum flavoured lip scrub as I am not a huge fan of the taste of mint and I found the popcorn one just too salty. 'My Boy Lollipop' tastes sugary sweet and smells delicious.


This lip scrub uses fine castor sugar grains to gently buff and remove flaky dead skin. This is best achieved by dabbing your fingertip into the pot and once a few grains are stuck to your finger taking it and rubbing it in small circles across both your lower and upper lip working into the corners from the centre to ensure the skin on your lips is all fresh and clean. Then the jojoba oil acts, soaking into the newly revealed skin, it moisturises and nourishes your fresh and flake free lips.

The directions for use recommend that you "scrub and buff your lips to softness" and then "lick off the excess" before applying your favourite lip balm. However I like to use mine when I'm either in the shower or washing my face with warm water. I find that warm water softens the skin making it easier to remove dead skin cells without tearing your lips. I also don't particularly like to lick my lips clean. Not that the scrub doesn't taste lovely and sugary sweet, I just don't like the idea of eating my own dead skin- but that's just me! I use this scrub every second or third day, in the winter I might even use it every day depending on how my lips are faring. I really believe this is like a miracle cure as it removes flaky, chapped looking skin from my lips leaving them looking soft and smooth. The best part is, the little 25g pot lasts forever as I have had it for about eight months now and the pot is still over half way full!


These lip scrubs do seem pricey at around €8 a pot. However considering how long the product lasts and how well it treats dry flaky lips I would recommend it to anyone. It's perfect if you were planning on wearing a dark lip colour and find you have dry lips as it takes seconds to work, it also works as a regular exfoliator to keep your lips healthy and in kissable smooth condition!

Friday, August 16, 2013

Monsters University Nail Tutorial!

Ah Monsters Inc. the movie that was the highlight of my eight year old life... Recently they brought out a Monsters University which goes back to when Mike and Sulley were in university which is kind of amazing because most of us who loved Monsters Inc. are in college now and appreciate this 'kids' movie all the more!

Of course, it was impossible not to do a nail art look in honour of this new movie. I decided to show you guys just how easy it is to get this nail art business down!

First you will need:

  • Nail Polish Remover
  • Cuticle Oil
  • Base Coat
  • Cocktail Sticks (or a striper brush)
  • A Dotting Tool
  • Cotton Wool
  • Green, blue, darker blue, white, black and lilac nail polishes
  • A small piece of sponge
Now, before I start painting any colours on I like to take all my old nail polish off with some cotton wool and nail varnish remover. I then file and shape my nails so that they are manageable (my nails are so bad for breaking when they are long). I like to rub in a nice soothing cuticle oil like Sally Hansen's "Vitamin E Nail and Cuticle Oil" into my cuticles before pushing them back and getting rid of dead skin. I find that this step really helps to keep your cuticles and nails in general looking clean and neat no matter how you paint your nails after! After cleaning the oil off, I like to use a good multi tasking base coat like Sally Hansen's "Complete Care Extra Moisturizing 4-in-1 Treatment". This nail polish goes on as a ridge smoothing, clear base coat (vital for preventing staining of your nails) but it also acts as a nail strengthener and helps nails grow. On top of that it works as a high gloss top coat. These are all things that nails that break as easily as mine need badly! Both of these products are found easily in most chemists and pharmacies across Ireland and are both roughly between €6 and €10. I would definitely recommend these if your nails are brittle, very weak or if you have dry, flaky cuticles.


Now, for the colour!


Here I used three main colours on my nails and they are as follows:
  • Thumb, Ring and Pinky Finger - Rimmel London I love Lasting Finish in '045 Misty Jade'
  • Index Finger - O.P.I (Nicki Minaj Collection) in 'Did it on 'Em'
  • Middle Finger - Nails Inc. in 'Floral Street'
I used at least three (and in some cases four) coats of these colours as they are quite streaky at first and you need good colour pay off if you want to be able to use these as bases for your nail art. Don't worry if you go a little outside the lines here, we'll clean up later!

Here comes the fun stuff!
First we'll look at Mike Wazowski in all his one-eyed glory...


To do this you need to take your largest dotting tool and dip it in white nail polish. Taking this white polish you need to dot it in a large circle a little above the halfway point on your index fingernail. This will be Mike's beautiful eye! After the white has dried, take the smaller end of your dotting tool and dab a little circle of blue into the centre of the white circle creating the iris. Then take a cocktail stick and paint an even smaller circle of black inside the blue making the pupil of the eye. Once the eye is done you just take a striper brush (or another cocktail stick) and take your black nail polish. Paint a small curved line beneath the eye as this will make Mike's toothy grin! Using your cocktail stick again take a white polish and dot little teeth along the top of Mike's mouth. Ta dah! Mike Wazowski is now smiling up at you!

Next we have James P. Sullivan, or 'Sulley'.

This was far less time consuming to do. Apply the following steps to all the fingers painted in your lighter blue colour (in my case, 'Misty Jade'). Take a small sponge (you could even cut the corner off of a kitchen sponge it doesn't need to be fancy) and pick it up using a tweezers (this will make it easier to manoeuvre). Dip the sponge in your lilac paint and then gently sponge it on in small circular sections sporadically across your three nails. Try to make them look as irregular in size as Sulley's are, also don't worry too much about getting perfect circles of pure lilac as you want to make it look a little like scruffy fur!
Our final piece of detail in this design is on the middle finger. Here we'll paint the 'M' at the start of Monsters University.

This part is pretty simple, you take a cocktail stick (or striper brush) dip it in the darker blue and paint a solid capital 'M' over the white polish. Once dry, you paint a small white oval in the centre of the 'M'. Taking your cocktail stick again you do a small black dot within the white oval.

Once all these little details have dried you can take your top coat (for me, it's my Sally Hansen 4-in-1) and paint over each nail sealing in the colour and protecting the layers of paint. Then you can take a cotton bud,  dip it into nail polish remover and sweep along the sides of your nails to fix up any messy bits!


And there you have it! You've nailed a Monsters University nail art look in no time!

Wednesday, August 14, 2013

Tangle Teezer Review

I have to admit my hair is probably my greatest downfall, considering my love for all things pretty and beauty related! I have always found it impossible to style my hair. It's very fine and far too thin for my liking! After the infamous and disastrous 'Bob Incident' of 2008 my hair has grown to my waist and while it's super simple to just leave naturally straight most days, the tangles and knots I used to get in it were a nightmare to brush out!

Enter the original Tangle Teezer boasting "a revolutionary teeth formation that delivers speedy and gentle results" that "helps minimize hair breakage caused by mistreatment when detangling." Sounds like exactly what I needed! I'd read mixed reviews on this brush but was intrigued (and desperate) enough to pay the hefty €15.99 and see the results for myself!


The Tangle Teezer is an unusually shaped plastic brush that fits comfortably into the palm of your hand.


I have to admit, I was dubious at first. I mean, realistically, how much good was a weirdly shaped plastic brush with a load of plastic bristles going to do for my hair that my trusty old normal hairbrush couldn't?

I have never been more wrong! The brush really does detangle your hair effortlessly and in no time! Before I would spend a good ten minutes using a wide tooth comb to detangle my hair after washing it. Now because the Tangle Teezer can be used on wet or dry hair I can detangle my hair in a minute tops! The best part though is that it really doesn't tear out nearly as many hairs as my comb did.


I'm actually hugely impressed by this little brush! It's definitely worth the cost as my hair has already started to look healthier and shinier in the past week that I've used this. I would recommend this to people with all types of hair. My sister, who has lovely thick curly hair, bought this brush after seeing how well it worked for me and she finds she has no frizz after brushing like she normally would and her hair looks shinier too!

Let me know if any of you have tried this brush, did you find it as great as I did?

Tuesday, August 13, 2013

Feathers Vs Fuzzy?

On the never ending, purse lightening quest to find the most unusual and interesting nail polishes I have been lusting after the Nails Inc. 'Feather Effect Polish' for quite some time.


In four absolutely gorgeous shades are these not the stuff of beauty addicts dreams?! I am particularly taken with the gorgeous 'Edinburgh Feathers' colour, a beautiful polish with countless fine strands in pale blue and peach (the fourth one in the above line up). However, if that's not your style then how about 'Cornwall Feathers' filled with blue and white feather-like strands, 'Chester Feathers' with pale blue, yellow and peach strands or even 'York Feathers' which has lovely peach and white strands?
 
Close-up of 'Edinburgh Feathers'.

Walking out of Debenhams (my local beauty oasis) empty handed has always been a struggle for me but the day I first laid my eyes on these bad boys it was a true test of my recession busting skills to look at the €16.50 price tag and walk away.

Here is where the story has a cheap and cheerful ending. Want to get a nail polish similar to these ones but save yourself some cherished euros? Then Sally Hansen and their new line of 'Fuzzy Coat' nail polishes is your answer!

Look at them! Aren't they so bright and fuzzy looking? Don't you just want to buy all of them? They are said to 'give nails a 3D textured, woven fiber effect' but in reality they are exactly the same texture as the Nails Inc. Feathers collection. Besides which, they all have adorable fuzzy names to match their cute colours.

Wool Lite - pink and white strands
All Yarned Up - yellow, orange, light blue and darker blue strands (similar from afar to Edinburgh Feathers)
Peach Fuzz - orange, peach and yellow strands (a slightly brighter version of York Feathers by Nails Inc.)
Tight Knit - blue and white strands (a good dupe of Cornwall Feathers by Nails Inc.)
Fuzz-Sea - turquoise, light green and white strands (a dupe of Brighton Feathers by Nails Inc.)
Fuzzy Fantasy - light green and white strands
Wool Knot - turquoise, blue and white strands
Tweedy - black and white strands

At about €6 each (I got mine on sale where I bought a Sally Hansen Complete Salon Manicure nail polish, in 540 Frutti Petutie, and got a Fuzzy Coat free) these are definitely a cheaper alternative for a gorgeous nail look! I bought Fuzz-Sea and absolutely love it! 

With either brand, whether you decide to splurge or go for the cheaper option, the application is the same. If you paint on one coat you get a clear top coat with a few strands speckled over your nails. A second coat builds up the number of strands but again a lot of base coat is seen. I personally prefer to use three good thick coats of these nail polishes to get full coverage. It dries quite quickly and once dry looks a lot less thick then when you originally layered the coats on! These are lovely eye catching nail polish looks that take minimal effort. They can last anywhere from a week to a week and a half without chipping which is impressive. However, a word of warning, these do take a bit of scrubbing to take off as the strands are quite stubborn!


Despicable Nails!

I'm sure you've all at least heard of this hilariously cute movie:


With Steve Carell as the evil genius, Gru, who wants to steal the moon with the help of a whole host of Minions (aka the cutest things ever) how could it not make my list of Fun Movies To Watch (yes, that is the official title of my official list)?!


See? Literally the cutest things ever!

Anyways, enough gushing. Down to the fun stuff! Since they have brought out a 'Despicable me 2' I have decided that my nails need to get a little despicable too!


My love for the minions knows no bounds! These nails were very simple to do and actually only took me about twenty minutes from start to finish. Although, I feel I should probably point out that the thumb nail is in fact supposed to be the dungarees the minions wear.

The colours I used are:
Catrice - 700 Birdy Reloaded!
Catrice - 400 Blue Cara Ciao
Rimmel London I love Lasting Finish - 080 Black Cab
Rimmel London 60 Seconds - 805 Grey Matter
Nails Inc. - Floral Street
17 Lasting Fix Nail Polish - Fairy Cake